How to Feed a Sourdough Starter: 3 Secrets for Perfect Fermentation
If you’ve ever wondered how to feed a sourdough starter, you’re not alone. Maintaining a healthy and active sourdough starter is essential for baking the perfect loaf of sourdough bread. With its unique tangy flavor and delightful texture, sourdough has captured the hearts (and taste buds) of home bakers around the world. But, how can you ensure that your starter remains robust and ready for baking? The answer lies in understanding the feeding process and its significance.
Visual appeal plays a vital role in the world of baking, especially when it comes to sourdough. Picture a golden, crusty loaf that boasts a beautiful ear, with a soft, airy crumb that is full of flavor. The pride you feel when it comes out of the oven is unmatched. But before you can achieve that perfect loaf, you must first take care of your sourdough starter, which is the heart of your baking journey.
Have you ever felt overwhelmed or uncertain about how to keep your starter alive and thriving? Do you question if you’re feeding it correctly or often enough? You’re not alone; many home bakers face similar challenges. The key to a successful sourdough starter lies in proper feeding techniques, which can lead to a flourishing culture that produces exceptional bread.
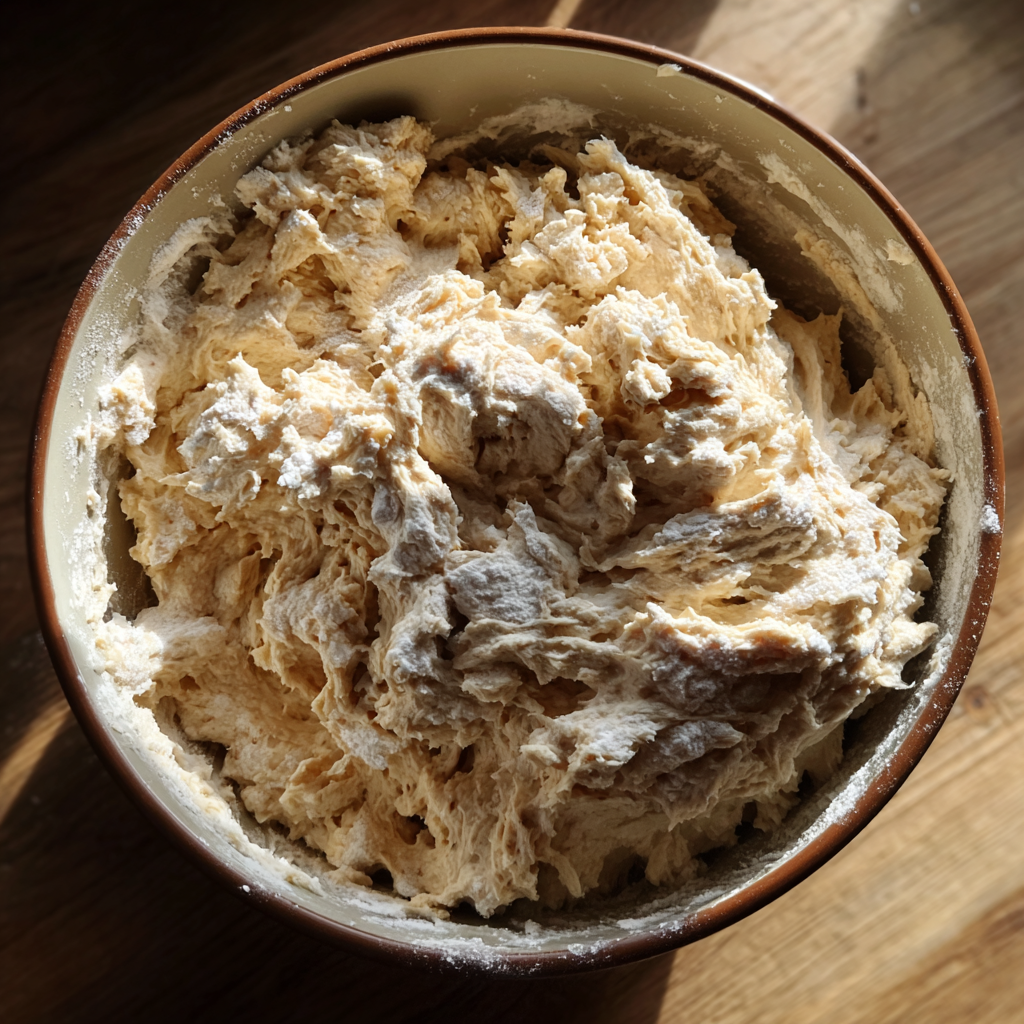
To understand the feeding process, it’s essential to visualize the texture, colors, and flavors that a healthy sourdough starter can produce. Imagine a thick, bubbly mixture that is slightly sticky to the touch, with a pleasant aroma that hints at its fermented nature. The colors may range from off-white to a creamy hue, showcasing the active yeast and bacteria at work. When baked into bread, this starter yields a wonderfully chewy texture and a perfect balance of sweet and sour flavors. The taste is rich, with a depth that only comes from a well-fed and healthy starter.
Maintaining a sourdough starter is ideal for home bakers for several reasons. First and foremost, it allows you to bake fresh bread whenever you desire, creating an impressive centerpiece for your family meals or gatherings. Sourdough bread is not only delicious but also offers a range of health benefits, including improved digestibility and a lower glycemic index compared to commercial bread. Moreover, having an active sourdough starter means you can explore various recipes, from pancakes to pizza dough, all enhanced by that signature sourdough flavor.
Additionally, sourdough starters are perfect for sharing with friends and family, making them excellent gifts for fellow baking enthusiasts. Imagine the joy on their faces when you present them with their very own live starter, ready for them to nurture and transform into mouthwatering baked goods. The social media appeal of sourdough bread is undeniable, with stunning photos of loaves gracing platforms like Instagram and Pinterest. Your sourdough creations can inspire others and showcase your skills as a home baker.
This recipe stands out because it delves into the intricacies of maintaining an active sourdough starter. By learning how to feed a sourdough starter effectively, you can ensure that your culture remains healthy and productive. This guide provides you with three essential secrets for perfect fermentation. Furthermore, these techniques are beginner-friendly, making it easy for anyone to embark on their sourdough journey. You will also discover tips for customizing your starter to suit your baking style, including how to adjust hydration levels and flavor profiles.
In addition to the secrets shared in this guide, the efficiency of managing a sourdough starter cannot be overstated. With a little attention and care, you can produce a vibrant starter that yields multiple loaves of bread. This method allows for bulk preparation, meaning you can easily share your starter with others or even sell your delicious sourdough bread at local markets.
In summary, learning how to feed a sourdough starter is a rewarding experience that opens the door to the world of artisan bread baking. With just a few simple steps, you can create a thriving culture that enhances your baking endeavors. So, are you ready to dive into the world of sourdough? Here’s a quick overview of what you can expect:
- Prep time: 5 minutes
- Chill time: None required
- Yield: Enough starter for multiple baking sessions
- Skill level: Beginner-friendly
- Perfect for: Baking fresh sourdough bread, pancakes, and more
What is a Sourdough Starter?
A sourdough starter is a mixture of flour and water that captures wild yeast and bacteria from the environment. This natural fermentation process creates a living culture that produces the leavening needed for sourdough bread. Unlike commercial yeast, a sourdough starter offers a unique flavor profile and a more complex crumb in your bread.
Why You Will Love Feeding Your Sourdough Starter
- Easy to prepare in bulk, allowing you to bake regularly.
- Customizable colors and flavors to suit your preferences.
- Perfect for party presentation, showcasing your baking skills.
- Kid-friendly and mess-free, making it a fun activity for the whole family.
- Ideal for selling or gifting your homemade creations.
Ingredients You Need
- Flour: All-purpose flour or whole wheat flour for structure and flavor.
- Water: Filtered or bottled water for hydration and fermentation.
- Time: Patience is essential, as fermentation takes time.
How to Feed a Sourdough Starter Step by Step
- Measure: Start by measuring out equal parts of flour and water. A common ratio is 1:1:1, meaning 100 grams of starter, 100 grams of flour, and 100 grams of water.
- Mix: Combine the flour and water in a bowl, adding the starter to create a smooth mixture. Stir until there are no dry bits of flour.
- Let it rest: Cover the bowl with a clean cloth or plastic wrap and let it sit at room temperature for 4-6 hours. This allows the natural fermentation process to take place.
- Check for bubbles: After the resting period, check for bubbles and a rise in your starter. This indicates that fermentation is happening.
- Repeat: Continue this feeding process every 24 hours, adjusting the amounts based on how much starter you have and how often you plan to bake.
Pro Tip: Use a kitchen scale for precise measurements to ensure consistent results!
Expert Tips for Best Results
- Use fine crumbs for a smooth texture and better fermentation.
- Avoid adding too much water or flour at once; stick to the 1:1:1 ratio.
- Keep the temperature stable, around 70°F (21°C), for optimal yeast activity.
- Work in batches to avoid overwhelming your starter.
- Use deep cups for mixing and storing to allow for expansion.
- Tap the container gently to release any air bubbles after mixing for a smooth finish.
Variations and Substitutions
- Use different types of flour, such as rye or spelt, to enhance flavor.
- Experiment with hydration levels—higher hydration starters yield a more open crumb.
- For gluten-free options, consider using gluten-free flours like brown rice or almond flour.
- Try adding a bit of fruit puree or honey to provide additional sugars for fermentation.
- Mix in seeds or spices for unique flavor profiles.
How to Serve and Store
Serving: Use your sourdough starter to bake fresh loaves, pancakes, waffles, or even pizza dough.
Storage: Store your starter in the refrigerator if not using regularly. Feed it at least once a week to keep it active.
Freezing: Yes, you can freeze your starter for up to 3 months. Just make sure to feed it before freezing.
Reheating: Not required, but you will need to feed your starter after removing it from the fridge or freezer.
Frequently Asked Questions
How long does a sourdough starter last?
With proper feeding and storage, a sourdough starter can last indefinitely.
Can I freeze my sourdough starter?
Yes, you can freeze your starter for up to three months. Remember to feed it before freezing.
What if my starter isn’t bubbling?
If your starter isn’t bubbling, it may need more time or a warmer environment for fermentation.
Can I make sourdough bread without a starter?
No, a sourdough starter is essential for the fermentation process in sourdough bread.
Why is my sourdough bread dense?
Dense sourdough can result from an inactive starter or not enough hydration in the dough.
Can I sell sourdough bread made with my starter?
Yes! Many bakers successfully sell sourdough bread made with their homemade starters.
In conclusion, learning how to feed a sourdough starter is a rewarding and enjoyable endeavor. By mastering the feeding process, you ensure that your sourdough starter remains healthy and active, allowing you to create delicious baked goods. The visual appeal and satisfying texture of your sourdough creations will impress friends and family alike. So why wait? Try feeding your sourdough starter today, and share your delightful results with the world!
Print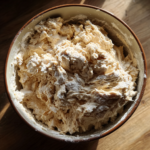
How to Feed a Sourdough Starter: 3 Secrets for Perfect Fermentation
Ingredients
- 1 cup (120g) all-purpose flour
- 1/2 cup (120ml) lukewarm water
- 1/4 cup (60g) active sourdough starter
Instructions
- In a clean mixing bowl, combine the active sourdough starter and lukewarm water. Stir until the starter is dissolved.
- Add the all-purpose flour to the mixture and stir until fully incorporated. The mixture should form a thick, shaggy dough.
- Cover the bowl with a cloth or plastic wrap and let it sit at room temperature for about 4 to 12 hours, or until it becomes bubbly and doubles in size.
- Once your starter has risen, it is now ready to be used for baking or can be stored in the refrigerator for future use.
Notes
- Feed your starter at least once a week if stored in the fridge. Bring it to room temperature before feeding.
- Adjust the flour and water ratios based on how thick or runny you prefer your starter.
- If your starter has a strong odor or shows signs of mold, discard it and start anew.
Nutrition
- Serving Size: 1/4 cup starter
- Calories: 50
- Sugar: 0
- Fat: 0
- Carbohydrates: 10
- Fiber: 0
- Protein: 1