How to Start a Sourdough Starter: Everything You Need to Know
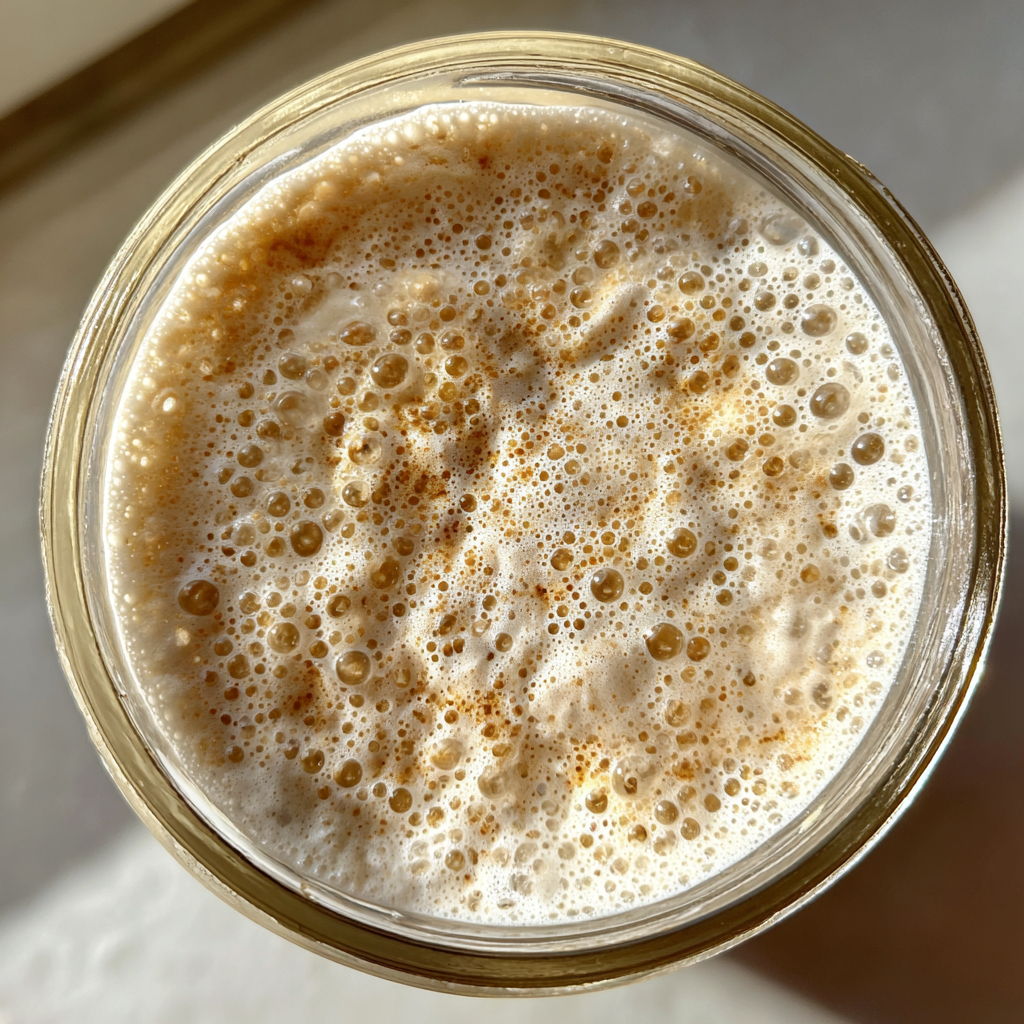
Creating your own sourdough starter is one of the most rewarding baking experiences you can embark on. The journey begins with how to start a sourdough starter, and it’s more than just mixing flour and water. The visual appeal of bubbling, active dough is captivating and signifies the magic of fermentation. Have you ever wanted to bake bread that has not only a crusty exterior but also a soft, chewy interior? As you embark on this adventure, you’ll feel a sense of pride and accomplishment as you watch your starter come to life.
The texture of a well-fed sourdough starter is a delightful mix of airy bubbles and smoothness, promising a bread that’s light and fluffy. Imagine the warm, golden crust, the tangy aroma wafting through your kitchen, and the first bite of that warm, homemade bread. With colors ranging from creamy white to golden browns, every loaf tells a story of patience and care. The taste—oh, the taste!—is a delightful balance of sweet and slightly tangy, making each bite a memorable experience.
As you celebrate the art of sourdough baking, you’ll find that it’s not just about the bread but also about the journey of nurturing and growing your starter. Whether you’re preparing for a family gathering, a weekend brunch, or simply a cozy evening at home, having your own sourdough starter elevates your baking game. The excitement of sharing homemade bread with loved ones is unparalleled. So, are you ready to dive into the world of sourdough?
In this comprehensive guide, we’ll explore the importance of a sourdough starter and its role in creating incredible homemade bread. Sourdough starters are perfect for anyone looking to add a unique flavor and texture to their baked goods. They are also a fantastic conversation starter at gatherings, providing a sense of nostalgia and connection to traditional baking methods. With their portability and ease of use, sourdough starters can be enjoyed by anyone, from novice bakers to seasoned pros. Plus, they are incredibly photogenic—perfect for sharing on social media platforms like Instagram and Pinterest!
Why are sourdough starters so ideal for home bakers? The answer lies in their versatility. They can be used not only for bread but also for pancakes, waffles, and even cakes. The fermentation process enhances the flavor profile and nutritional value of your baked goods, making them more delicious and wholesome. As a bonus, maintaining a sourdough starter can be a fun and engaging hobby that brings joy to your kitchen experience.
The best part? This guide covers 5 proven tips for success that will ensure your sourdough starter thrives. We’ll start with the basics and walk you through the process step-by-step, making it beginner-friendly. The efficiency of creating a starter that produces consistent results cannot be overstated. You’ll learn how to create a healthy and active starter that can be used for all your sourdough baking needs.
In summary, this guide will cover:
- What a sourdough starter is and why it’s trending
- Why you will love making your own starter
- Essential ingredients needed for your starter
- Step-by-step instructions for starting and maintaining your starter
- Expert tips for best results
- Variations and substitutions for different flavors
- How to serve and store your sourdough starter
What is a Sourdough Starter?
A sourdough starter is a living culture made from flour and water that captures wild yeast and bacteria from the environment. This is why learning how to start a sourdough starter is so rewarding; you’re cultivating a unique blend of microorganisms that can produce delicious bread with a distinctive flavor. The trend of using sourdough starters has surged in popularity, especially during the pandemic, as more people sought comfort in baking.
Unlike commercial yeast, sourdough starters rely on natural fermentation, resulting in a more complex flavor profile and improved texture in baked goods. The process of making sourdough bread with a starter is also a beautiful way to connect with the age-old traditions of baking, allowing bakers to create something truly unique and personal.
Why You Will Love Making Your Own Starter
- Easy to prepare in bulk: Once you’ve established your sourdough starter, you can easily scale your baking by simply feeding it more flour and water.
- Customizable colors and themes: You can experiment with different types of flour, such as whole wheat or rye, to create various flavors and colors.
- Perfect for party presentation: Freshly baked sourdough bread is an impressive centerpiece for any gathering or event.
- Kid-friendly and mess-free: Involving kids in the process of making a sourdough starter can be an educational and fun family activity.
- Ideal for selling or gifting: A healthy sourdough starter makes a thoughtful gift for friends or family who love to bake.
Essential Ingredients You Need
- Flour: This is the base of your starter. All-purpose flour, whole wheat flour, or rye flour can be used.
- Water: Use filtered or bottled water to avoid chlorine, which can inhibit yeast growth.
- Time: Patience is key! It may take around 5-7 days for your starter to become fully active.
How to Start a Sourdough Starter Step by Step
- Day 1: Combine 1 cup of flour and 1/2 cup of water in a clean glass jar. Mix well until there are no dry clumps. Cover loosely with a lid or cloth and let it sit at room temperature for 24 hours.
- Day 2: Check for bubbles. If you see some, that’s a good sign! Discard half of the mixture and add another 1 cup of flour and 1/2 cup of water. Stir and cover again.
- Day 3: Repeat the process: discard half, feed with flour and water, and cover loosely.
- Day 4: You should see more bubbles and the mixture should be rising. Continue with the same feeding process.
- Day 5: By now, your starter should have a pleasant sour smell and be active. If it is, continue to feed it daily. If not, keep going for another couple of days.
- Day 6-7: Your starter is ready when it doubles in size within 4-6 hours of feeding, has a bubbly surface, and smells tangy. You can now use it for baking!
Pro Tip: Always use a clean container and utensils when feeding your starter to avoid contamination.
Expert Tips for Best Results
- Use high-quality flour for better fermentation.
- Keep your starter at a stable temperature, ideally between 70°F to 75°F.
- Monitor your starter’s activity by marking the jar with a rubber band to see how high it rises.
- If you’re not baking regularly, store your starter in the refrigerator and feed it weekly.
- Experiment with different types of flour to find your favorite flavor.
Variations and Substitutions
- Whole Wheat Sourdough Starter: Use whole wheat flour instead of all-purpose for a nuttier flavor.
- Rye Flour Starter: Rye flour can help boost yeast activity due to its high nutrient content.
- Gluten-Free Option: Use a gluten-free flour blend, but be aware that the process may differ slightly.
- Adding Fruit: You can add pieces of fruit like pineapple for a few days to enhance fermentation.
- Flavor Enhancements: Consider incorporating spices or herbs once your starter is established.
How to Serve and Store Your Sourdough Starter
Serving: Sourdough is best served fresh from the oven. You can slice it for sandwiches, toast, or serve it alongside soups and salads.
Storage: Your starter can be stored in the refrigerator for up to a week without feeding. Remember to take it out a day or two before you plan to bake to feed it and reactivate.
Freezing: Yes, you can freeze your starter for up to 3 months. Just make sure to feed it well before freezing and thaw it in the refrigerator when you’re ready to use it.
Reheating: Not required! Just feed your starter after removing it from the fridge or freezer.
Frequently Asked Questions
How long does it take to create a sourdough starter?
It typically takes about 5-7 days for a sourdough starter to become fully active.
What should I do if my starter isn’t bubbling?
Ensure you are using warm water and that your starter is kept in a warm environment. Also, check that you are feeding it regularly.
Can I use tap water for my starter?
It’s best to avoid tap water due to chlorine, which can inhibit yeast growth. Use filtered or bottled water instead.
How often should I feed my sourdough starter?
If stored at room temperature, feed it once every 24 hours. If refrigerated, feed it once a week.
What type of flour is best for sourdough starter?
All-purpose flour works well, but whole wheat or rye flour can enhance fermentation and flavor.
Can I sell my sourdough starter?
Yes, many people enjoy sharing their starters, and they can be a profitable item to sell at local markets.
In conclusion, learning how to start a sourdough starter is not only simple but also incredibly rewarding. With its visual appeal and ease of preparation, you’ll find joy in nurturing your starter and creating delicious bread. So why not give it a try today and share your results with friends and family? Your homemade sourdough journey awaits!
Print
How to Start a Sourdough Starter: 5 Proven Tips for Success
Description
Learn how to create and maintain your own sourdough starter with this comprehensive guide. Perfect for baking delicious sourdough bread at home!
Ingredients
- 1 cup
- 1/2 cup
- additional flour and water
Instructions
- Day 1: In a clean glass jar, combine 1 cup of flour and 1/2 cup of water. Stir until there are no dry lumps. Cover loosely with a lid or cloth and let sit at room temperature (70°F to 75°F) for 24 hours.
- Day 2: Check for bubbles. If you see some, great! If not, wait another 24 hours. Add another 1 cup of flour and 1/2 cup of water to the jar, mix well, and cover loosely.
- Day 3: You should see more bubbles and the mixture should start to rise. Discard half of the starter (about 1 cup), then feed it with 1 cup of flour and 1/2 cup of water. Mix well and cover loosely.
- Days 4-7: Continue the feeding process daily. You should notice the starter becoming more active, bubbly, and rising higher after each feeding.
- Day 7: The starter should have doubled in size and have a pleasant, slightly sour smell. If it has, it’s ready to use for baking! If not, continue feeding for a couple more days.
Notes
- Use a kitchen scale for more accurate measurements when baking.
- If your starter is too thick, add a little more water during feedings.
- Make sure to keep the starter in a warm place, away from drafts.
Nutrition
- Serving Size: 1 tablespoon of starter
- Calories: 30
- Sugar: 0
- Sodium: 1
- Fat: 0
- Carbohydrates: 6
- Fiber: 0
- Protein: 1
Keywords: sourdough starter, how to start a sourdough starter, sourdough bread, homemade sourdough, baking sourdough