How to Make a Sourdough Starter from Scratch in Just 5 Days for Irresistible Bread
Creating a homemade sourdough starter is an exciting journey that allows you to unlock the art of baking delicious, rustic bread at home. With just a few simple ingredients, you can learn how to make a sourdough starter from scratch in just 5 days. The visual appeal of your future baked goods will be stunning, with golden crusts and airy, flavorful interiors that are sure to impress anyone at your table. Have you ever wondered how to achieve that perfect crust and tangy flavor in your bread? The pride you feel when you pull a loaf from the oven, with its crispy exterior and soft, chewy center, is unmatched.
The texture of homemade sourdough bread is a delightful combination of a soft, airy crumb and a crunchy crust that crackles when you slice into it. Imagine the colors of your bread: a beautiful golden brown crust, with a light, creamy interior that has those characteristic holes from the fermentation process. The taste is a wonderful balance of sweet and tangy, with a hint of nuttiness from the flour. Each bite is a celebration of flavors that evokes the joy of baking and sharing with loved ones.
Making a sourdough starter is not just about the final product; it’s about the journey of nurturing live cultures. This process is ideal for those who want to delve into baking and experiment with flavors. Whether you’re planning a family dinner, a brunch with friends, or simply want to enjoy some homemade bread, having a sourdough starter on hand can elevate your culinary creations to new heights.
Sourdough starters are incredibly versatile, making them perfect for various occasions. They can be used in everything from artisanal loaves to pancakes, waffles, and even pizza dough. The beauty of a sourdough starter lies in its portability and the portion control it offers. You can easily scale your starter up or down, depending on your baking needs. Plus, the aesthetic appeal of freshly baked sourdough bread is undeniably Instagram-worthy, making it a hit on social media platforms like Pinterest and Instagram.
This recipe stands out because it efficiently yields a bubbly and active sourdough starter in just five days, allowing you to get started on your baking adventures sooner rather than later. The beginner-friendly method is designed to guide you through each step, ensuring that you can create your very own starter without any prior experience. Additionally, the starter can be customized with different types of flour and feeding schedules, allowing you to experiment and find the perfect flavor profile that suits your taste.
In this article, you will find a comprehensive guide on how to make a sourdough starter from scratch in just 5 days. The process is simple and requires minimal ingredients: just all-purpose flour and water. You will also learn about the key factors that contribute to a successful starter, including the importance of temperature, humidity, and time.
Here’s a quick summary of what to expect: the total prep time is minimal, with daily feedings taking only a few minutes. You’ll need to allow your starter to ferment for a total of five days before it’s ready to use. This recipe yields enough starter to bake several loaves of bread, making it perfect for culinary enthusiasts and home bakers alike. So gather your ingredients, and let’s get started on this exciting journey to homemade sourdough!
What is a Sourdough Starter?
A sourdough starter is a mixture of flour and water that has been fermented by wild yeast and beneficial bacteria. This culture serves as a natural leavening agent, allowing bread to rise without the need for commercial yeast. The process of creating a starter harnesses the power of nature, enabling you to bake bread that is not only delicious but also unique to your environment. The trend of sourdough baking has surged in popularity, especially during the pandemic, as people sought out comforting activities and homemade food.
Why You Will Love Making Your Own Sourdough Starter
- Easy to prepare in bulk: With just a few simple ingredients, you can create a large quantity of starter that can be used for multiple baking sessions.
- Customizable colors and themes: Experiment with different types of flour, such as whole wheat or rye, to develop unique flavors and colors in your bread.
- Perfect for party presentation: Impress guests with freshly baked sourdough loaves that are both visually stunning and incredibly delicious.
- Kid-friendly and mess-free: Involve your children in the baking process; they’ll love watching the bubbles form and can help with the feeding process.
- Ideal for selling or gifting: A healthy sourdough starter can be a wonderful gift for fellow baking enthusiasts or a product to sell at local markets.
Ingredients You Need
- All-purpose flour: This is the primary ingredient that provides structure and flavor to your starter. You can also use whole wheat or rye flour for different flavor profiles.
- Water: Use filtered or bottled water to avoid chlorine and other chemicals that can inhibit the growth of yeast. The water should be at room temperature for optimal fermentation.
- Repeat the use of all-purpose flour and water as necessary throughout the process.
How to Make a Sourdough Starter Step by Step
- Day 1: In a clean glass or plastic container, mix 1 cup of all-purpose flour with 1/2 cup of water. Stir until you have a thick, paste-like consistency. Cover the container loosely with a lid or cloth and let it sit at room temperature for 24 hours.
- Day 2: You may not see any bubbles yet, but that’s okay! Discard half of the mixture (about 3/4 cup) and add another 1 cup of all-purpose flour and 1/2 cup of water. Stir well, cover loosely, and let it sit for another 24 hours.
- Day 3: By now, you should notice some bubbles forming. Repeat the process of discarding half of the mixture and adding 1 cup of flour and 1/2 cup of water. Stir, cover, and let sit for another 24 hours.
- Day 4: Your starter should be more active, with a pleasant sour smell. Again, discard half and feed with 1 cup of flour and 1/2 cup of water. Cover loosely and let it sit for 24 hours.
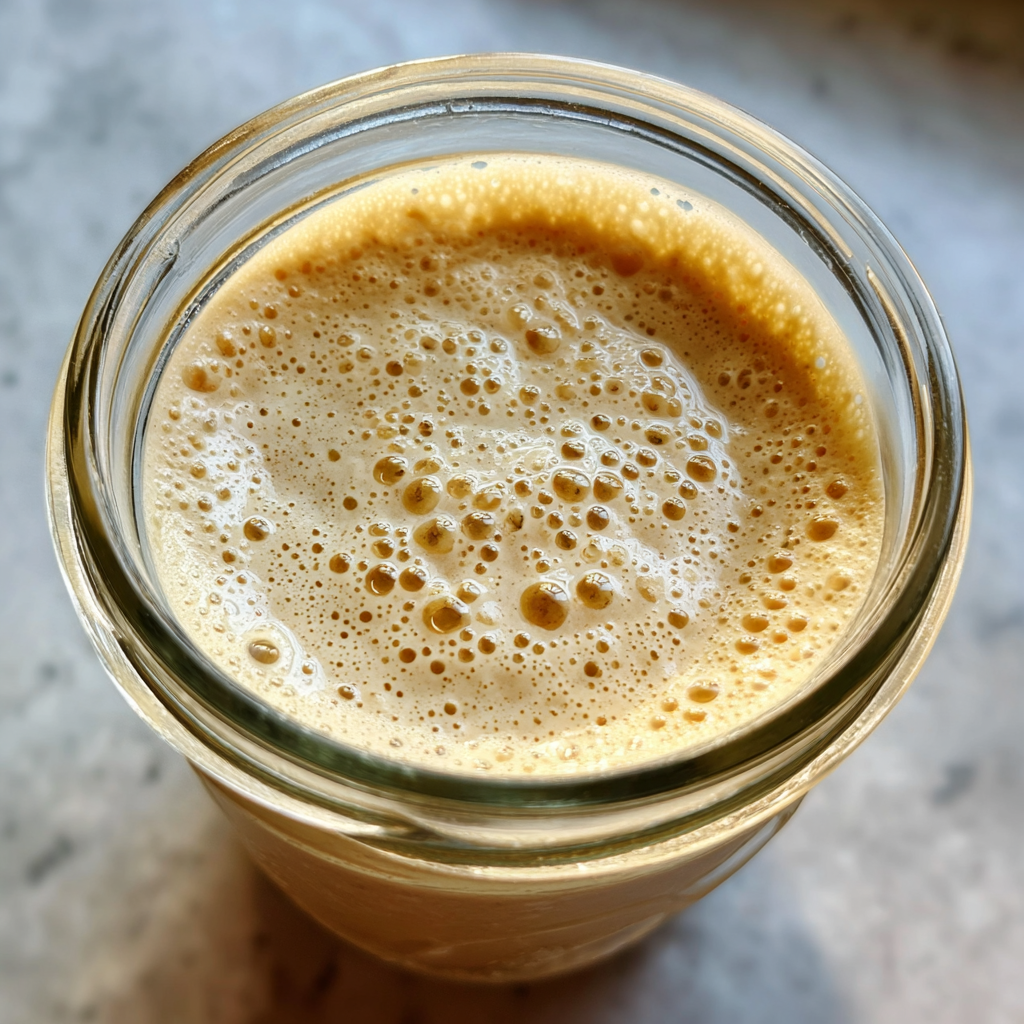
- Day 5: Your starter should be bubbly and doubled in size. You can now test its readiness by performing the “float test.” Take a small spoonful of starter and drop it into a glass of water. If it floats, it’s ready to use! If not, continue feeding for another day.
Pro Tip: Always use a clean utensil when handling your starter to avoid contamination and ensure a healthy fermentation process.
Expert Tips for Best Results
- Use fine crumbs for a smooth texture when mixing your starter.
- Avoid adding too much water; the consistency should be thick but stirrable.
- Keep the coating temperature stable; ensure your starter stays in a warm environment (ideally 75-80°F) for optimal fermentation.
- Work in batches if you are making multiple starters or recipes.
- Use deep cups for dipping if you are using your starter for recipes that require liquid.
- Tap gently on the counter after mixing to create a smooth finish.
Variations and Substitutions
- Whole wheat sourdough starter: Substitute all-purpose flour with whole wheat flour to enhance the flavor and nutritional content.
- Rye sourdough starter: For a robust flavor, try using rye flour instead of all-purpose flour.
- Gluten-free starter: Use gluten-free flour blends to create a gluten-free sourdough starter.
- Dairy-free options: Ensure all ingredients used are plant-based if you want to maintain a dairy-free starter.
- Flavor variations: Experiment with adding ingredients like honey or malt extract to enhance the flavor profile of your starter.
How to Serve and Store Your Sourdough Starter
Serving: Use your sourdough starter to bake delicious loaves of bread, pancakes, or other baked goods. The possibilities are endless!
Storage: You can keep your starter in the refrigerator for up to two weeks without feeding it. Just make sure to bring it back to room temperature and feed it before using.
Freezing: Yes, you can freeze your starter for up to 3 months. Make sure to thaw and reactivate it before using.
Reheating: Not required; simply feed your starter and let it come to life again at room temperature.
Frequently Asked Questions
How long does it take for a sourdough starter to be ready?
Typically, it takes about 5 to 7 days for a sourdough starter to develop enough activity and bubbles to be ready for baking.
Can I use tap water for my sourdough starter?
It’s best to use filtered or bottled water, as tap water may contain chlorine that can inhibit the growth of yeast.
Why does my sourdough starter smell bad?
A sourdough starter should have a pleasant, slightly tangy smell. If it smells off or putrid, it may be contaminated, and you should discard it.
Can I make sourdough bread without a starter?
No, a sourdough starter is essential for creating the leavening and flavor in sourdough bread.
How do I know if my starter is healthy?
A healthy starter will be bubbly, have doubled in size within a few hours of feeding, and have a pleasant sour smell.
Can I share my sourdough starter with friends?
Absolutely! Sharing your starter is a wonderful way to introduce others to the joys of baking sourdough bread.
In conclusion, learning how to make a sourdough starter from scratch in just 5 days is a rewarding experience that can greatly enhance your baking skills. The visual appeal of your homemade sourdough bread, combined with its unique flavors and textures, will undoubtedly impress family and friends. So why wait? Try making your sourdough starter today, and don’t forget to share your results with fellow baking enthusiasts!
Print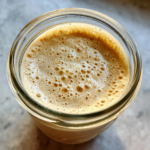
How to Make a Sourdough Starter from Scratch in Just 5 Days for Irresistible Bread
Description
This recipe will guide you through the process of creating a bubbly and active sourdough starter from scratch in just 5 days, using simple ingredients and techniques.
Ingredients
- 1 cup All-purpose flour
- 1/2 cup Water
- 1 cup All-purpose flour
- 1/2 cup Water
- 1 cup All-purpose flour
- 1/2 cup Water
- 1 cup All-purpose flour
- 1/2 cup Water
- 1 cup All-purpose flour
- 1/2 cup Water
Instructions
- In a clean glass jar, combine 1 cup of all-purpose flour with 1/2 cup of water. Stir until there are no dry flour pockets. Cover loosely with a lid or a cloth and let it sit at room temperature (around 70°F to 75°F) for 24 hours.
- Check your mixture for bubbles. If you see some, that’s a good sign. Discard half of the mixture (about 3/4 cup) and add 1 cup of all-purpose flour and 1/2 cup of water. Stir well and cover loosely again.
- Repeat the process: Look for bubbles and discard half of the starter. Add 1 cup of all-purpose flour and 1/2 cup of water. Stir well and cover loosely.
- Continue the same feeding process as previous days: Discard half, then add 1 cup of all-purpose flour and 1/2 cup of water. Stir and cover loosely.
- On the fifth day, your starter should be bubbly and have doubled in size. Discard half, then add 1 cup of all-purpose flour and 1/2 cup of water one last time. Stir well and cover tightly. Your sourdough starter is now ready to use!
Notes
- Keep the starter at room temperature for best results.
- If your starter is not bubbling, try moving it to a warmer spot in your kitchen.
- You can store your starter in the refrigerator if you are not baking frequently. Just remember to feed it once a week.
Keywords: sourdough starter, how to make sourdough starter, sourdough from scratch, easy sourdough starter, 5 day sourdough starter