
Ah, St. Patrick’s Day! It’s one of those magical days when everything gets a little green and festive, and trust me, nothing says celebration like a delicious dessert. I remember growing up, my family would whip up a special *St. Patrick’s Day dessert recipe* that brought us all together. The aroma of chocolate wafting through the house made it impossible not to smile. We’d gather around the kitchen, laughing and enjoying the little moments as we waited for that cake to rise. There was something about the combination of rich cocoa and that vibrant green hue that made it feel extra special. Now, every year, I carry on that tradition, baking this easy yet delightful dessert that everyone adores. It’s not just about the flavors, but the memories created while baking and sharing it with loved ones. So let’s make some sweet St. Patrick’s Day magic together!
Ingredients List
You’ll want to gather these simple yet essential ingredients to create your festive *St. Patrick’s Day dessert recipe*. Each one plays a crucial role in making this treat delicious and memorable:
- 1 cup all-purpose flour – This is the base of your dessert, giving it structure.
- 1/2 cup unsweetened cocoa powder – For that rich chocolate flavor that everyone loves.
- 1 cup sugar – Sweetness is key, and this will balance the cocoa beautifully.
- 1/2 cup butter, softened – Make sure it’s at room temperature for easy creaming with the sugar.
- 2 large eggs – These will add moisture and help bind everything together.
- 1/2 cup milk – Use whole milk for creaminess, but any milk will work.
- 1 teaspoon vanilla extract – A must for that lovely depth of flavor.
- 1/2 teaspoon baking powder – This helps the dessert rise and become fluffy.
- 1/4 teaspoon salt – Just a pinch to enhance all the other flavors.
- Green food coloring – This is where the magic happens! Add as much as you like for that festive touch.
- Whipped cream for topping – A light, airy finish to complement the chocolatey base.
Now that you’ve got your ingredients ready, let’s dive into creating this delightful dessert that’s sure to impress!
How to Prepare Instructions
Let’s get baking! Here’s a simple step-by-step guide to whip up your festive *St. Patrick’s Day dessert recipe* that’s not only delicious but also a fun way to celebrate this special day:
- Preheat your oven: Start by preheating your oven to 350°F (175°C). This step is crucial as it ensures even baking right from the start.
- Mix the dry ingredients: In a medium bowl, whisk together the all-purpose flour, cocoa powder, baking powder, and salt. This helps to combine and aerate the ingredients for a lighter texture.
- Cream the butter and sugar: In a large mixing bowl, cream the softened butter and sugar together until it’s light and fluffy. This should take about 2-3 minutes using an electric mixer. You’ll know it’s ready when it looks pale and airy!
- Add eggs and wet ingredients: Beat in the eggs, milk, and vanilla extract to the butter mixture. Mix until it’s well combined and smooth.
- Combine the mixtures: Gradually add the dry ingredients to the wet mixture, stirring gently until just combined. Be careful not to overmix, as we don’t want a dense cake!
- Add the festive touch: Now for the fun part! Add green food coloring to the batter, mixing until you reach your desired shade of green. Go ahead and get creative!
- Pour into the pan: Pour the batter into a greased baking pan, spreading it out evenly. It should be about half full to allow for rising.
- Bake: Place the pan in the preheated oven and bake for 25-30 minutes. Keep an eye on it, and perform the toothpick test—insert a toothpick in the center, and it should come out clean.
- Cool: Once baked, remove the cake from the oven and let it cool in the pan for about 10 minutes. Then transfer it to a wire rack to cool completely. This cooling time is essential for perfect slicing!
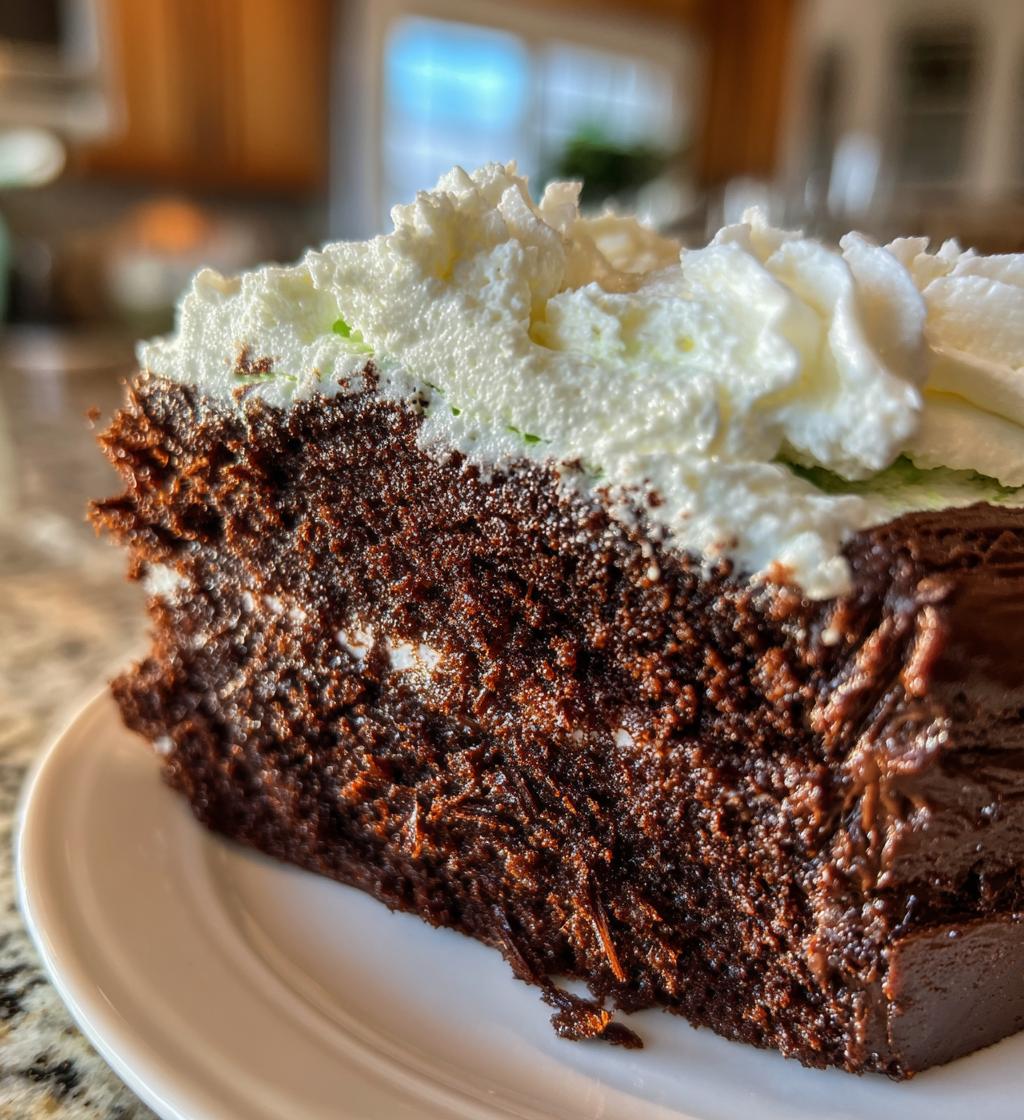
- Serve: Finally, slice your beautiful creation and top each piece with a generous dollop of whipped cream. Enjoy your delightful *St. Patrick’s Day dessert* with family and friends!
There you have it! Follow these steps, and you’ll create a scrumptious dessert that’s perfect for celebrating St. Patrick’s Day in style.
Why You’ll Love This Recipe
This *St. Patrick’s Day dessert recipe* is not just a treat; it’s a celebration of flavors and fun! Here are a few reasons why you’ll absolutely adore making this festive dish:
- Quick to prepare: With just 15 minutes of prep time, you’ll have your dessert in the oven in no time, making it perfect for last-minute celebrations!
- Festively themed: The vibrant green color not only brings joy but also adds a playful touch to your St. Patrick’s Day festivities. Everyone will love the spirit it brings to your table!
- Deliciously chocolatey: This dessert is rich, moist, and full of chocolate flavor, satisfying any sweet tooth. Who can resist a chocolate treat, especially one that’s so festive?
- Perfect for parties and gatherings: Whether you’re hosting a big family get-together or a cozy gathering with friends, this dessert is sure to impress and be the highlight of the meal!
So, roll up your sleeves and get ready to create something special that everyone will be talking about long after the last slice is gone!
Tips for Success
To ensure your *St. Patrick’s Day dessert recipe* turns out as delightful as it sounds, here are some pro tips that I swear by:
- Keep an eye on baking times: Ovens can vary, so start checking your cake at the 25-minute mark. A toothpick inserted in the center should come out clean or with just a few moist crumbs.
- Mixing food coloring: When adding green food coloring, start with a few drops and mix thoroughly. You can always add more if you want a bolder shade, but remember that less is more for a natural look.
- Serving suggestions: For an extra festive touch, consider adding mint-flavored whipped cream or sprinkling crushed mint candies on top. It adds a refreshing twist that pairs beautifully with the chocolate!
- Cooling is key: Let your dessert cool completely before slicing. This helps it maintain its structure and makes for cleaner, prettier pieces!
With these tips, you’ll be set up for success, and your dessert will be the star of the show!
Variations
Want to switch things up with your *St. Patrick’s Day dessert recipe*? Here are some fun and delicious variations to make it even more festive!
- Different Toppings: Instead of just whipped cream, try using a cream cheese frosting for a richer flavor. A drizzle of chocolate ganache on top adds an extra layer of indulgence!
- Flavor Enhancements: Add a splash of mint extract to the batter for a refreshing twist. It pairs wonderfully with the chocolate and really embodies the spirit of St. Patrick’s Day!
- Alternative Ingredients: For a gluten-free version, swap the all-purpose flour for a 1:1 gluten-free baking mix. It works surprisingly well, and no one will miss the gluten!
- Mix-ins: Fold in some mini chocolate chips or chopped nuts into the batter for added texture and flavor bursts in every bite.
These variations can take your dessert to the next level while keeping the festive vibe alive. Enjoy experimenting!
Storage & Reheating Instructions
After whipping up your delightful *St. Patrick’s Day dessert recipe*, you might have some leftovers (if you’re lucky!). To keep your dessert fresh and tasty, follow these simple storage tips:
- Storing: Allow your dessert to cool completely before storing. Wrap it tightly in plastic wrap or place it in an airtight container. This helps retain moisture and keeps it from drying out.
- Refrigeration: Store your dessert in the fridge if you plan to keep it for more than a couple of days. It should last about 3-4 days in the refrigerator.
- Freezing: For longer storage, you can freeze slices of the dessert. Just make sure to wrap each slice individually in plastic wrap, then place them in a freezer-safe bag. They can last up to 2 months in the freezer!
- Reheating: When you’re ready to enjoy your dessert again, simply thaw in the fridge overnight if frozen. To reheat, pop a slice in the microwave for about 15-20 seconds, or heat it in the oven at 350°F (175°C) for 5-10 minutes. Top with fresh whipped cream before serving!
These steps will ensure your festive dessert stays delicious and ready to be enjoyed whenever the craving strikes!
Nutritional Information Section
Understanding the nutritional aspects of your *St. Patrick’s Day dessert recipe* can help you enjoy it even more! Here are the estimated values per serving, so you know what you’re indulging in:
- Calories: 250
- Total Fat: 10g
- Saturated Fat: 5g
- Unsaturated Fat: 3g
- Trans Fat: 0g
- Cholesterol: 40mg
- Sodium: 150mg
- Total Carbohydrates: 35g
- Dietary Fiber: 2g
- Total Sugars: 20g
- Protein: 3g
Please keep in mind that these numbers are estimates and can vary based on specific ingredients and portion sizes you choose. So, go ahead and enjoy every bite of this festive treat while celebrating with your loved ones!
FAQ Section
Got questions about this delightful *St. Patrick’s Day dessert recipe*? Don’t worry, I’ve got you covered! Here are some common inquiries that pop up, along with my answers:
- Can I make this dessert ahead of time? Absolutely! This *St. Patrick’s Day dessert* actually tastes even better the next day as the flavors meld together. Just be sure to store it properly in an airtight container in the fridge.
- How can I make it less sweet? If you prefer a less sweet dessert, you can reduce the sugar by about 1/4 cup. Just keep in mind that it might affect the overall texture slightly, but it will still be delicious!
- What if I don’t have green food coloring? No green food coloring? No problem! You can leave it out for a classic chocolate dessert, or try using natural alternatives like spirulina powder for a green hue.
- Can I use a different type of flour? Yes! If you’re looking for a gluten-free option, use a 1:1 gluten-free baking mix. It works well, and you won’t miss the regular flour!
- How can I jazz up the whipped cream topping? Consider adding a splash of mint extract or a bit of cocoa powder to your whipped cream for an extra festive flair. It pairs beautifully with the chocolate cake!
These tips should help you navigate any questions you might have while whipping up this festive dessert. Happy baking!
Final Thoughts
I can’t wait for you to try this *St. Patrick’s Day dessert recipe*! It’s not just a treat; it’s a way to create memories and enjoy the spirit of the holiday with friends and family. I’d love to hear how yours turns out! Did you add your own twist or a special topping? Share your experiences in the comments below! Your feedback means the world and helps others discover this delightful recipe.
Also, don’t forget to snap some pictures of your festive creation and share them on social media. Tag me so I can see your beautiful bakes! And if you enjoyed the recipe, please take a moment to rate it. Each rating helps spread the joy of baking and makes my day brighter. Happy baking, and may your St. Patrick’s Day be as sweet as this dessert!
Print
St Patrick’s Day Dessert Recipe: 7 Reasons You’ll Adore It
- Total Time: 45 minutes
- Yield: 8 servings 1x
- Diet: Vegetarian
Description
A festive dessert for St. Patrick’s Day.
Ingredients
- 1 cup all-purpose flour
- 1/2 cup unsweetened cocoa powder
- 1 cup sugar
- 1/2 cup butter, softened
- 2 large eggs
- 1/2 cup milk
- 1 teaspoon vanilla extract
- 1/2 teaspoon baking powder
- 1/4 teaspoon salt
- Green food coloring
- Whipped cream for topping
Instructions
- Preheat your oven to 350°F (175°C).
- In a bowl, mix flour, cocoa powder, baking powder, and salt.
- In another bowl, cream butter and sugar together.
- Add eggs, milk, and vanilla to the butter mixture.
- Gradually mix in the dry ingredients.
- Add green food coloring until desired color is reached.
- Pour the batter into a greased baking pan.
- Bake for 25-30 minutes or until a toothpick comes out clean.
- Let cool before serving.
- Top with whipped cream before serving.
Notes
- Adjust the amount of green food coloring to your preference.
- Serve chilled for a refreshing taste.
- Pair with mint-flavored treats for extra flavor.
- Prep Time: 15 minutes
- Cook Time: 30 minutes
- Category: Dessert
- Method: Baking
- Cuisine: Irish
Nutrition
- Serving Size: 1 piece
- Calories: 250
- Sugar: 20g
- Sodium: 150mg
- Fat: 10g
- Saturated Fat: 5g
- Unsaturated Fat: 3g
- Trans Fat: 0g
- Carbohydrates: 35g
- Fiber: 2g
- Protein: 3g
- Cholesterol: 40mg
Keywords: st patricks day dessert recipe, festive dessert, Irish dessert